Monday, December 28, 2015

Prawn, Mango and Avocado Salad


My favourite salad! The recipe I used is from Woolworths but I don't really measure the ingredients. The link on Woolworths is the actual recipe but the one below is what I used.

Ingredients:

1 plate of cooked, peeled prawns (I am lazy, I just bought one plate off Coles, from their website 200g)
2 mangoes
2 avocados
1 red chilli
1 birds eye chilli (because the first time I made, the red chilli doesn't really give any taste)
A big handful of coriander
1 large lime

Method:

  1. Place prawns in a large bowl.
  2. Remove mango cheeks by slicing down each side of the stone. Scoop out flesh with a large spoon and dice.
  3. Peel avocado, remove stone and slice.
  4. Add mango, avocado, red chilli, coriander leaves and lime juice to bowl with prawns. 
  5. Gently toss until well combined.
  6. Squeeze lime over salad

Enjoy but don't overeat... that's for me :P


Side note: Long weekend coming to an end.. :(

Sunday, October 25, 2015

Mum's home cooked braised dried oyster


Mum used to only make this dish during Lunar New Year but because we are all living away from home, she makes this more often, as and when we request for it when go home.

Recipe makes about 23 little parcels.
Note: Mum used eating tablespoon, not the proper measuring tablespoon.


Not advertising or anything - just want to show how the bean curd skin looks like
Ingredients:

23 dried oysters - soak in hot water to soften it.
500g minced pork
100g dried mushroom (approximately 10 large size ones) - soak in water till soften, roughly chopped
2 tbsp soy sauce - reduced to taste depending on how salty the bean curd skin you buy
1/2 tbsp fish sauce
Dash of pepper
Bean curd skin

Method:
  1. Wash dried oysters once with water and salt then rinse. Pour water into the bowl containing dried oysters and let the dried oysters soak in this second batch of water (no salt)
  2. Add chopped dried mushroom to minced pork and add in soy sauce, fish sauce and pepper. 
  3. Wipe bean curd skin with damp cloth or kitchen towel so it is not so salty and easier to wrap.
  4. Divide minced pork into 23 portions so that the size is more of less the same and you have enough pork for all dried oyster prepared.
  5. Cut bean curd skin into 15x15 cm per piece. 
  6. Take one portion of minced pork and put on the cut bean curd skin. Place one dried oyster in the middle. 
  7. Wrap like how you would wrap spring roll. 
  8. Repeat till all dried oyster and minced pork is used up. 
  9. Pan fry all little parcels till bean curd skin is cooked so that it would not burst when braised. 
  10. Placed the already pan fried parcels into a pot and pour in the water used to soak dried oyster earlier. Top up the water till it just about to cover the parcels. 
  11. Braised for about 1-1.5 hours till the dried oysters are soft. 


Then.. tuck in and enjoy! Here's another photo just to show you how it looks like if you cut it open. It freezes well and you can just steam it in rice cooker when you cook rice straight from the freezer.

Sorry - all the photos are taken with iPhone 4 except the one below.


Side note: I'm the only one I know who watch Criminal Minds. O_o

Monday, July 27, 2015

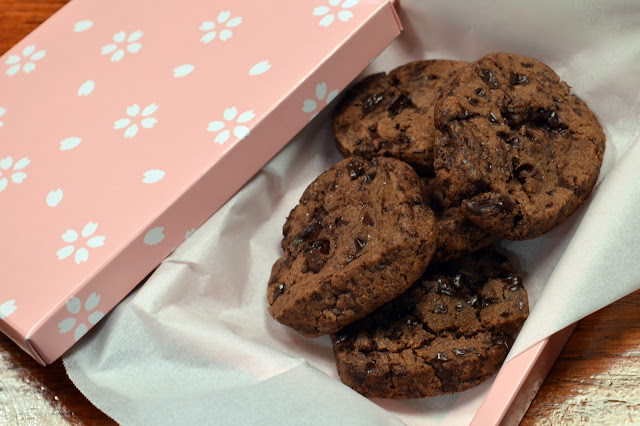
The most evil chocolate chip cookies


These cookies were initially named Korova Cookies after the restaurant where pierre Herme created these chocolate cookies. However the name was changed by Dorie Greenspan after her friends think that daily dose of them is needed for planetary peace and happiness. Hence the name World Peace. I was first introduced by a friend who baked them and told me these are the world's most evil chocolate cookies.

So the first name I know of these cookies is World's Most Evil Chocolate Cookies and a very suitable name too because they are good, and all cookies after consumed by me will just go straight to the hips... and stay there, unfortunately. Whatever name you want to call them, they are good choc cookies ;)

The original recipe said it made 36 cookies but I only get about 30 though, probably my cookies are a little bigger?

Ingredients:

175 grams all-purpose flour
30 grams unsweetened cocoa powder
1/2 teaspoon baking soda
150 grams unsalted butter, room temperature
120 grams packed light brown sugar --> I cut down to 80 grams
50 grams granulated sugar --> cut down to 30 grams
1/2 teaspoon fleur del sel or 1/4 teaspoon fine sea salt
1 teaspoon pure vanilla extract
150 grams bittersweet chocolate, chopped into chips (no pieces larger than 1/3 inch), or a generous 3/4 cup store-bought mini chocolate chips --> I used Lindt's 80% dark chocolate

Method:

  1. Sift the flour, cocoa and baking soda together. --> I'm such a lazy baker, I usually skip the sifting.. opps..
  2. Working with a stand mixer, preferably fitted with a paddle attachment, or with a hand mixer in a large bowl, beat the butter on medium speed until soft and creamy. 
  3. Add both sugars, the salt and vanilla extract and beat for 2 minutes more.
  4. Turn off the mixer. Pour in the flour mixture (flour, cocoa and baking soda), drape a kitchen towel over the stand mixer to protect yourself and your kitchen from flying flour and pulse the mixer at low speed about 5 times, a second or two each time. 
  5. Take a peek — if there is still a lot of flour on the surface of the dough, pulse a couple of times more; if not, remove the towel. Continuing at low speed, mix for about 30 seconds more, just until the flour disappears into the dough — for the best texture, work the dough as little as possible once the flour is added, and don’t be concerned if the dough looks a little crumbly. 
  6. Toss in the chocolate pieces and mix only to incorporate.
  7. Turn the dough out onto a work surface, gather it together and divide it in half. Working with one half at a time, shape the dough into logs that are 1 1/2 inches in diameter. 
  8. Wrap the logs in plastic wrap and refrigerate them for at least 3 hours. (The dough can be refrigerated for up to 3 days or frozen for up to 2 months. If you’ve frozen the dough, you needn’t defrost it before baking — just slice the logs into cookies and bake the cookies 1 minute longer.)

Getting ready to bake: 

  1. Center a rack in the oven and preheat the oven to 160°C. 
  2. Line two baking sheets with parchment or silicone mats.
  3. Working with a sharp thin knife, slice the logs into rounds that are 1/2 inch thick. (The rounds are likely to crack as you’re cutting them — don’t be concerned, just squeeze the bits back onto each cookie.) 
  4. Arrange the rounds on the baking sheets, leaving about one inch between them.
  5. Bake the cookies one sheet at a time for 12 minutes — they won’t look done, nor will they be firm, but that’s just the way they should be. Transfer the baking sheet to a cooling rack and let the cookies rest until they are only just warm, at which point you can serve them or let them reach room temperature.

Saturday, July 25, 2015

Begedil (Malay Potato Patties)


I got the recipe from Nasi Lemak Lover and made these as part of my 'peace offering' nasi lemak meal.

Ingredients:

4 potatoes (400 g), peel the skin, cut into small pieces
1 tbsp dried shrimps, soak in water till soften, chopped roughly
1 tbsp fried shallots
1 tbsp chopped parsley leaves
1/2 tsp fine salt or to taste
White pepper powder
1 egg, lightly beaten

Method:

  1. Deep fry potatoes till golden brown and cooked. Drained. --> I boiled the potatoes
  2. Using a food processor, to mash the potatoes. --> I mashed it with fork and spoon
  3. Put the mashed potato in a mixing bowl, mixing in chopped dried shrimps, fried shallots, chopped parsley leaves, salt and pepper, mix well. Shape into patties.
  4. Coat the patties with egg, deep fry over medium heat till golden brown on both sides.

Tuesday, July 14, 2015

Chicken Rendang


I got the chicken rendang recipe I used from here. I have made them twice and have got very good reviews from my friends.

I did use shallots, just pretend that onion is shallot ok? ;)

Ingredients:

(A) To be blended into paste
5 cloves garlic, skin removed and hard ends trimmed
10 shallots, skin peeled
3" ginger, skin removed and cut into chunks
1" galangal, skin removed
10 birds eye chilies (preferably those of red ones for a better paste color)
15 dried chilies, soaked to soften, halved and seeds partially removed
1" fresh turmeric, skin peeled
5 sticks lemongrass (4" from the base), tough outer layer removed
2 candlenuts

(B) Other spices
1 cinnamon stick
3 cardamom pods
5 kaffir lime leaves, finely shredded --> I cut with scissors, the finer it is the less chance you will chew on them and don't have to remove after cooking

(C) Others 
1 young chicken (about 1.3 to 1.8 kg), skinned and trimmed then chopped into medium sized pieces --> I bought some lovely legs and a piece of breast meat added up to about 1 kg. 
1/2 cup grated coconut
200 ml thick coconut milk
100 ml water
1 tbsp sugar
salt to taste
4 tbsp cooking oil --> I used just enough to coat the base of the saucepan

Method:

  1. Blend ingredients (A) into a rough paste, set aside.
  2. Heat up some oil in a saucepan or wok at medium heat and stir fry blended paste till aromatic, takes maybe 10 minutes. 
  3. Add ingredients (B) and continue stir fry for another 1-2 minutes.
  4. Add chicken and water. Mix well. 
  5. Cover and simmer under medium low heat for 30 minutes, stir occasionally.
  6. Meanwhile toast grated coconut on a clean and dry non stick frying pan without oil till golden brown. Remove and pulse for a few seconds so that it is finer. 
  7. 30 minutes later, add coconut milk into saucepan. Mix well. 
  8. Bring heat back up to medium and simmer uncovered for another 30-60 minutes till your desired consistency. 
  9. About 10 minutes before done, add toasted grated coconut and mix well. 
  10. Add sugar and salt to taste, mix well. 
  11. Ready to serve.

Best when serve with nasi lemak! ^^

Sunday, July 12, 2015

Nasi Lemak


If I am still living in Malaysia, the thought of cooking nasi lemak will never cross my mind. After all nasi lemak is the national dish of Malaysia, maybe unofficially. Nevertheless, you can find it everywhere - mamak stalls, road side peddlers, coffee shops, pasar malam or even higher end restaurants serving Malaysian food.

Unfortunately I do not have the luxury of walking down to the nearest mamak stall and get my dose of nasi lemak now. Also somehow most of the sambal on offer in Melbourne are on the sweeter side. I decided that I will learn to cook nasi lemak and have tried many different sambal recipe. My most trusted food taster gave the highest review to this version of sambal, the recipe by Adam Liaw.

Usually I serve the nasi lemak with prawn sambal (and other usual condiments) but I wanted to make the chicken rendang this round. Serving it together with prawn sambal seems too much protein so I throw in begedil. To be honest, I much prefer serving it with prawn sambal but long story short I cooked this as a 'peace offering' and the person who is eating it likes rendang better I think.

Anyway, here goes...

(A) Coconut rice:
I used Adam Liaw's recipe as well for the coconut rice.

Ingredients:

450 g jasmine rice --> I cooked 300 g (approximately 2 1/2 rice cup)
180 ml coconut cream --> 120 ml coconut milk (I bought coconut milk for the chicken rendang)
1/2 tsp salt --> 1/4 tsp salt
3 pandan leaves, tied together into a knot --> 2 pandan leaves

Method:

  1. Wash the rice as how you usually do. 
  2. Add coconut milk, salt and pandan leaves.
  3. Top up with water to the usual level for cooking rice in rice cooker
    **Adam Liaw's recipe steam the rice, of course I cheated and use the rice cooker. 

(B) Sambal
Also from Adam Liaw's Two Asian Kitchen, said makes 300-350 ml (I never measure so I can't tell for sure)

Ingredients:

2 tbsp tamarind pulp
10 eschalots, roughly chopped
10 red chillies (any variety you like) --> I usually put more birds-eye but will include some large red chillies for colour. I once used habanero because I can't find birds-eye...
4 garlic cloves, roughly chopped
100 ml neutral-flavoured oil --> I usually only use a bit, just enough to coat the pan)
60 g palm sugar, roughly chopped --> on hardworking days I use palm sugar because it took me ages to chop them, else I just substitute with raw sugar or brown sugar. I don't put 60 g palm sugar at one go but a little by little and taste as I go because I prefer my sambal less sweet)
5 g sea salt flakes --> salt to taste because I don't weigh this either
1 tsp belacan (dried shrimp paste), optional --> depending on who I serve the sambal too, if they are Malaysians I do include toasted belacan (I usually wrap up the belacan in aluminium foil and toast them on a pan till fragrant)

Method:

  1. Put tamarind pulp in heatproof bowl and add 250 ml boiling water. Stir occasionally and leave to cool for about 10 minutes or till it is cool enough to handle. Strain and press the solids with the back of the spoon to extract as much liquid as possible. 
  2. Add eschalots, chillies and garlic in a food processor and process to a rough paste. 
  3. Heat oil in a saucepan over medium heat, add the paste and reduce heat to low. 
  4. Cook the paste for 10-15 minutes, stirring regularly until much of the moisture has evaporated and mixture is fragrant. 
  5. Add tamarind liquid, sugar, salt and belacan (if using). Cook, stirring occasionally for 10-15 mixture until red oil separates from the mixture. Taste and adjust to your liking. 

(C) Crispy ikan bilis (anchovies)


Ingredients:

Ikan bilis (anchovies) ---> unlike the two cooks in the links below, I don't weigh my ikan bilis either. Just grab enough to serve. 

(i) Oven baked option - recipe from here and here
Method:

  1. Pre-heat oven to 180°C
  2. Wash and clean the ikan bilis (anchovies)
  3. Pat dry on paper towel and lay flat on one layer on baking tray
  4. Bake for 10-15 minutes, toss and spread them evenly halfway through baking
  5. Increase oven to 200°C and bake for another 5-10 minutes or till ikan bilis are golden brown and crispy. 
  6. Cool completely and store
(ii) Microwave option
Method:

  1. Wash and clean the ikan bilis (anchovies)
  2. Lay them on microwavable plate and zap them on 40-50 seconds rounds till they are dry and crispy.
    Note: My friend zap them on 1 minute round but I have just tried this option and didn't want to burn my ikan bilis. She does the whole process on microwave but I finished it in oven at 200°C for 5 minutes. 

(D) Peanuts
Ha - I just use whatever nuts I have at home. If I don't have any, I usually buy beer nuts.

(E) Eggs
If I eat it right after I eat, I usually do a sunny side up but I'm bringing this to work tomorrow so they are boiled. The egg in the photo above is actually a duck egg boiled in rolling boil for 8 1/2 minutes. (can you tell it is duck egg?)

(F) Cucumber
I use continental cucumber. Peeled and thinly sliced. If you want, you can scratch the side vertically a few times with a fork for some visual presentation.

(G) Chicken Rendang - I used recipe from here (will do another post for this, just because I am paranoid that the blogger will take down her blog as there have been no updates for awhile :|

(H) Begedil (Potato patties) - I used recipe from here with some variation (will blog up later)
Thursday, May 28, 2015

Amarula Carrot Cake


No, I didn't lie. It is a carrot cake, see the orange bits? Yes, this is a carrot cake without cream cheese frosting. I have issues with frosting and I usually scrap them out when I eat. Half the people whom I share the calories with doesn't eat the frosting either. So I made a carrot cake with no frosting.

I first read about Amarula carrot cake from here. Of course the recipe said the Amarula can be substituted with Baileys but then it isn't Amarula carrot cake anymore, isn't it. I would then have to call it Baileys carrot cake. Long story short, I managed to get Little P to grab me a bottle when she travelled home to Malaysia from the free duty shop. Of course I need to have a few sips to see if I like the flavour before making the cake and I love it! So here's the cake, with some modifications as I made do with what's leftover in the house.

Let's pretend there are 3 carrots and 1 can of pineapple. The peanut butter bottle contains bicarbonate of soda
Again, please find original recipe here (the author is one of Masterchef contestant). I used the ml measurement.

Ingredients:

Cake
4 large eggs at room temperature
1¼ cups (300 g) castor sugar --> I cut down to 150g
1¼ cups (310 ml) grapeseed oil --> I used rice bran oil
2 cups (about 3) grated carrots
1 canned pineapple grated and drained well --> I used Golden Circle Pineapple Pieces in Natural Juice Canned 440g
1 cup chopped pecan nuts --> I used crushed peanuts
¼ cup Amarula Cream, plus extra ¼ cup for soaking later
½ cup (125 ml) apricot jam --> I used strawberry jam
2 cups (240 g) plain flour
2 tsp baking powder
1 tsp bicarbonate of soda
1 tbsp mixed spice --> I used 1 tsp cinnamon (I was afraid the cinnamon would be overpowering)
1 tsp salt --> after I put in the salt, I give it a taste and feel it is a bit salty, so I added another splash of Amarula cream
Extra chopped pecan nuts and pistachio, for garnish --> also crushed peanuts

Cream Cheese icing: ---> i omit the whole icing/frosting
125g cream cheese room temperature
¼ cup (100g) butter room temperature 
2 cups sifted icing sugar 
1 tbsp Amarula Cream

Method:

  1. Beat the eggs in a food mixer (or handheld mixer) for 3 minutes until thick, add the sugar gradually and whisk for another 2 minutes until the mixture is pale and thick. 
  2. Add the oil slowly and beat for another 2 minutes. 
  3. Pour mixture into a mixing bowl.
  4. Add carrots, pineapple, nuts, Amarula and apricot strawberry jam and stir well with a spatula. 
  5. Sift the dry ingredients into the mixture and fold in with a spatula until well mixed. (I found the jam sticking together a little, maybe because I used strawberry jam...)
  6. Preheat the oven to 180°C (350°F). 
  7. Line and grease a springform tin (used some rectangular pyrex bakeware) then pour the mixture into the prepared tin and for 1 hour and 10 minutes or until a skewer inserted into centre of the cake and came out clean. 
  8. Once ready, remove from oven and allow to cool in the tin for 10 minutes before turning out onto wire rack, and leave to cool completely.
  9. Use a skewer stick, poke tiny holes all over the top of the cake. Use a spoon and slowly pour amarula and let it soak into the cake. Make sure the liqueur is evenly spread through the cake and do not over soak it.
  10. I sprinkled crushed nuts and very little icing sugar on the top to camouflage the holes. 
  11. Add cream cheese and butter into a mixing bowl of a mixer, beat on high speed until creamy. Turn the speed to slow, gradually add the icing sugar a tablespoon at a time until all blended in. Pour amarula cream and give it another quick mix.
  12. Ice the cake with the cream cheese frosting, from side first, then the top. Grab a handful of chopped pecans and in a clockwise rotation, stick the nuts onto the side of the cake. Finally decorate the top with whole pecans, and sprinkle pistachio on top.


For some reason I forgot to add in all the dry ingredients (flour, baking powder, cinnamon and bicarbonate of soda) and I thinking to myself that the batter is quite watery..lol. Lucky for me that I had pre-measured the flour and while I was taste testing the batter, I saw the bowl that contained the flour. Ha!

I kid you not the batter for this cake is yummy, must be the Amarula!

Let's also pretend the ice-cream is in a perfect ball shaped ^^
To be honest, I don't actually remember how carrot cake taste like usually because I don't usually eat them...

Monday, May 18, 2015

Homemade Salted Eggs

I've always associated salted eggs with duck eggs but it appears that it could be done with chicken eggs. But - why use chicken eggs when Little P's colleague is selling organic eggs from home reared ducks! ^^

Recipe courtesy of Little P's aunt. I "harvested" this when my mum was here in Melbourne with me and she was hooked on this. This must be one of the few things that excite her.

The water is supposed to cover it all....
Ingredients:

6 cups of water
1 cup of salt
1 tbsp sichuan pepper
3 tbsp cooking wine (I used Shaoxing wine)
10 eggs (duck / chicken)

Method:
  1. Boil everything and cool to lukewarm
  2. Can use plastic container (I used glass container)
  3. Put for 30 days
Hard boiled salted egg

Sunday, May 17, 2015

Banana Bread


I've made a few banana breads and they are a bit on the heavy side. This one probably is a little on the heavy side for my liking but it also means I would be eating many at one good (that's a good thing on the waist and hips). However this is probably one of the better recipes I tried and doesn't use oil. I grabbed the recipe for here.

I used a more bruised and ripe bananas, almond pieces and vanilla extract not in picture and the bottle with yellow cap is soda bicarbonate

Ingredients:

160 g (1 1/3 cups) walnut or pecan pieces --> I used almond, that's the only nuts I have at home currently
85 g butter, melted and allowed to cool until lukewarm (if using unsalted butter, add 1/8 teaspoon fine table salt)
300 g (2 cups) plain flour
3/4 teaspoon bicarbonate of soda
168 g (3/4 cup) caster sugar --> I used brown sugar, packed and reduced to 1/3 cup)
390 g (1 1/2 cups) mashed very ripe banana
2 large eggs (we use eggs with a minimum weight of 59g)
1 teaspoon vanilla extract
90 g (1/3 cup) natural yoghurt.

Method:
  1. Preheat oven to 160 degrees Celsius fan-forced. 
  2. Place almond on a baking tray and bake for about 3 minutes or until fragrant. Set aside to cool to room temperature.
  3. Line a loaf pan.
  4. Stir flour, bicarbonate of soda and sugar together in a large bowl.
  5. In a medium bowl, stir or whisk together mashed banana, eggs, vanilla, yoghurt and melted butter. 
  6. Add almonds to the banana mixture and stir to combine.
  7. Add banana mixture to the bowl with the flour mixture and gently fold ingredients together until just combined. Don't over mix as this can make the banana bread tough. Transfer mixture to prepared pan.
  8. I put flaked almonds on the bread just because I have some leftovers and I love almonds ^^
  9. Bake for about 1 hour and 5 minutes, until a wooden skewer or thin-bladed knife inserted into the centre of the bread comes out without any batter attached.
  10. Allow banana bread to cool in the pan for about 10 minutes. 


All these sugar treats at home is not good for me! :|

Thursday, March 26, 2015

Mum's home cooked crab

Yes - we served it on the frying pan itself! :P
Mum cooked this when she was visiting because I was missing some crab dish. In fact I have not eaten any crab since left Malaysia. Anyway, like all mums, she cooks with her scientific method of "agak-agak" (means guesstimate). Once I've re-try this I shall update this recipe but in the meantime, just so I don't forget. It taste great and home as mum has always cook crabs this way since I'm a kid.

Ingredients:

6 blue swimmers crabs (I stay in Melbourne and bought this from Queen Victoria Market)
6 shallots (or 1 big onion) - according to Mum, best to use shallots as it is more fragrant (in cooking term)
8-10 red chillies
1 1/2 heaped soup spoon of yellow bean paste (start with 1 heaped soup spoon and scoop another 1/2 spoon. Yes - the Chinese spoon used to drink soup)
Oil to fry

Method:
  1. Clean the crabs.
  2. Cut and blend the shallots, chillies and yellow bean paste into a course paste (alternatively use mortar and pestle).
  3. Heat some oil and fry the paste till fragrant.
  4. Put in the crabs, mix well and coat the crabs with the paste.
  5. Cover the pan with lid and let it simmer till the crabs are cooked.
  6. Serve with mantou (if you have made or have some at hand), else goes with white rice too!

Tuesday, March 24, 2015

Spiral Curry Puff (Karipap Pusing)

Aiya - didn't realise the photo is a bit blur...
Mum came for a two week visit recently and brought along with her a hand-written recipe by my aunt of what Mum described as 2 layer curry puff. I don't have slightest idea what Mum meant about 2 layer curry puff. To me, 2 layer would be way too thick for a curry puff skin. Not only I don't get the 2 layer bits, the handwritten recipe only has ingredients, but no method at all. = ="

After a long description, I finally found out that what Mum meant was spiral curry puff or karipap pusing in Bahasa Melayu. As Mum showed extreme interest, I thought I would give it a try and asked my best friend, Mr Google for methods of making this curry puff and to see if the ingredients are similar.

I used recipe from here, who adapted it from here but unfortunately it was not successful - the pastry splitted, probably because it was too dry? I wasn't quite sure what went wrong. I didn't really have plans to re-try this as I only make it initially as Mum seem excited over it. However due to my possible slight obsessive compulsive trait, I decided to give it another try but increase the butter amount in grease dough.

Anyway, here goes.

Ingredients:

Water dough:
300 g plain flour
½ tsp salt
125 ml (or 1/2 cup) lukewarm water
1 small beaten egg
1 tbsp of oil

Grease dough:
150 g plain flour --> I don't have enough flour when I make this again, so I halved the recipe)
75 g cold butter --> on my second batch, I used used 75 g flour with 50 g butter (so a full recipe would be 150 g with 100 g cold butter)

Curry puff filling:
1 large onion (finely chopped)
2 cloves of garlic (finely chopped)
2 tbsp of good curry powder --> I used 1 tbsp curry powder, 1 tbsp mixture of masala
3 large potatoes (cut into small cubes)
100 g of chicken breast (diced)
250 ml (or 1 cup) water
A sprig of curry leaves or less


Method:
Curry puff filling:
  1. Start by cooking the curry puff filling, whilst the filling cools, started on the dough.
  2. Saute the onion and garlic in a wok (or a pan) over medium heat. Add the potatoes and stir fry until it softens. Add in the chicken and curry powder.
  3. Ensure that everything is coated in the curry powder before adding in the water. Add the water slowly (little by little) and allow the curry to simmer.
  4. Once the potatoes have soften and the curry forms a dry curry mixture, set aside and let cool.
Water Dough:
  1. Combine all ingredients and knead with fingers until the dough becomes soft, pliable and non-sticky. 
  2. Divide and roll the water dough into two equal balls. 
  3. Cover and set aside to rest for at least 30 minutes. (The grease dough took me very long, so it was definitely more than 30 minutes)
Grease Dough:
  1. Cube the butter and cut into the flour with two knives and a fork until it resembles crumbly coarse sand. (I rub the butter with flour like making apple crumble)
  2. Knead by hand until it turns shiny and smooth (dough-like consistency). --> this took me ages...
  3. Divide and roll into two equal balls.
Forming the curry puffs:
  1. Roll out water dough a little then enclose one ball of greased dough with water dough. 
  2. On a lightly floured surface roll the combine dough into a thin oval shape with a rolling pin. Roll it up and with one end facing you, roll the dough out again into a thin layer.
  3. Turn the dough 90 degrees, so one side of the circles are facing you and repeat the above. 
  4. Sliced into 1 cm disc and roll it flat but not too thin or it would split into layers. 
  5. Place a tablespoon of the curry puff filling into the centre of the flatten disc and fold over.
  6. Seal the edges of the dough together by pinching and folding the flour to form a rope. 


I've also frozen some and fried them straight without thawing. Would I make these again? Unless I am super motivated as it is fairly time consuming, especially since I am such a slow cook!


Tuesday, March 17, 2015

Almond Biscotti

My first introduction to almond biscotti was via a HK drama. Hah! Bet you didn't see that coming - it was a little out of norm as biscotti is more of an Italian thingy. Anyway, when I first move to Australia, one of the first few HK drama I watched was this Forensic Heroes II. One of the male character made some almond biscotti for another female character to go with coffee while watching sunset. I tried to make this a few years back when I was still staying in Sydney and it was unsuccessful.


Before CNY, my sis made a batch of it and pronounced them successful! My interested was piqued and of course, promptly made some too. Sis recommended recipe from food4tots, please refer to food4tots for a better, detailed recipe. 


Ingredients:

120 g plain flour (all-purpose flour)
30 g almond flour (ground almond)
½ tsp baking powder
1 egg (about 65g) – at room temperature
75 g castor sugar --> I used about 35 g
Pinch of salt
95 g almonds (raw)

Method:
  1. Rinse almonds lightly, pat dry with kitchen towel. (it’s optional) --> I skipped this step
  2. Place almonds on a baking tray and bake in a preheated oven at 160 C for 8 minutes. Give it a stir or shake after 4 minutes. (I may have forgot to.) Set aside to cool.
  3. In a medium mixing bowl, sieve plain flour, almond flour and baking powder. Then use a hand whisk to combine.
  4. In another bowl (a bigger one), beat the egg lightly with a hand whisk or electrical mixer. Add sugar and salt. Beat until the mixture is fluffy and pale. 
  5. Add in flour mixture (from step 3). Use a rubber spatula or plastic scraper to mix all the ingredients until well combined. You can use technique such as cut, press and scrape to mix. (I have no idea what this technique is…)
  6. Add in the roasted almonds. Mix until well combined and form a dough. At this stage, the dough is quite sticky. So, dust your hands and counter top with more flours before proceeding to the next step.
  7. Transfer the dough to a floured surface. Divide the dough into two equal portions, roll into log shapes (22 cm length x 5 cm width x 1.5 cm thickness) and then flatten slightly. 
  8. Place the logs on a baking tray lined with grease-proof baking paper. Transfer the tray to oven, bake at 160 C for 30 minutes or until well risen and firm. If your logs show uneven colour, rotate them at 180 degree towards the last 5 minutes.
  9. Remove from the oven and let it cool for about 15-20 minutes. 
  10. When the logs are cooled, use serrated knife to cut it diagonally into thin slices (0.3 cm thickness or thicker if crumble). 
  11. Arrange slices on the lined baking tray, transfer to oven, place at the lowest rack and bake for a further 150 C for 14 minutes (7 minutes for each side) or until slightly golden brown.
  12. Cool on rack and keep in an air-tight container for several weeks.


Sunday, March 15, 2015

Mini Lemon Tarts

I like desserts made with lemons - the tangy lemon taste kind of offset just the normal sweet dessert. Anyway, I benefit with some home grown lemons from Little P's boyfriend and as there was a planned small get together at my place, what's better than use the lemons and made some desserts? I went on my usual googling spree and found this easy to make mini lemon tarts. Mini size is great, one bit into the mouth :D

I got the recipe from Butter Baking. It appears it was initially adapted the pastry from David Lebovitz and filling from Tartine.

I have actually made this recipe twice in a month - once for the CNY get-together and second time when my mum was here visiting. Both times I halved the recipe and it made 24 mini tarts.

I cheated, this photo is taken on a separate day after I have made the tarts. The measuring jug contains some leftover lemon filing.
Ingredients:
Tart pastry:
180 g unsalted butter (6 oz) --> I used 90 g reduced salt butter
6 tbsp water --> 3 tbsp
2 tbsp vegetable oil --> 1 tbsp
2 tbsp sugar --> 1 tbsp castor sugar
Pinch of salt --> I omitted this as I used reduced salt butter
2 cups flour (300g, 10 oz) --> 1 cup

Lemon filling:
¼ cup plain flour (35g, 1¼ oz) --> 1/8 cup
1 cup sugar (220g, ½ pound) --> I used 3/8 cup (¼ cup + half of ¼ cup)
½ cup lemon juice (125ml, 4 oz, about 3 lemons) --> ¼ cup
zest from 1 lemon, grated --> zest from ½ lemon
3 eggs --> 1 big egg + 1 small egg
1 egg yolk --> 1 small egg
pinch of salt

Method:
To make tart pastry
  1. Preheat the oven to 200 C (400 F) and take out two mini muffin pans.
  2. Place the butter, water, oil, sugar and salt in an ovenproof bowl.
  3. Put the bowl in the oven for about 15 minutes until the butter is melted, bubbling, and just beginning to brown around the edges.
  4. Carefully remove the bowl from the oven and dump in the flour. Stir quickly, until the dough comes together and pulls away from the side of the dish.
  5. Put a teaspoon of dough into one mini muffin hole, and press it into the base and up the sides using fingers and try not to make a hole. Repeat until all the dough has been used.
  6. Prick the dough with a fork once or twice.
  7. Bake for 8 - 12 minutes until the pastry is golden brown all over.
  8. Remove from the oven and allow to cool slightly.
To make tart filing
  1. Reduce the oven to 150 C (300 F).
  2. Combine the flour and sugar in a medium mixing bowl.
  3. Add the lemon juice and zest to the same medium mixing bowl and mix to dissolve the sugar.
  4. In a separate bowl, whisk the eggs and the egg yolk with salt.
  5. Add the eggs into the lemon and sugar mixture and whisk until well combined.
  6. Put the mini muffin tins back in the oven, pull the oven rack out of the oven slightly and pour the filling into each pastry case while it is still in the oven. (I took the whole muffin tins out to pour the filling, don’t trust myself to work on the case while it is still in the oven)
  7. Shut the oven door and bake for 5 – 10 minutes until the centers are just set.


Err.. yes, I have limited resources of accessories to plate up and half the time I test-eat them very soon or store up in some container. Hopefully we shall see some improvement on this part down the road but don't let this stop you from trying this recipe. My mum loves it... and she is a strict judge!

Tapir Tamago

I was chatting with Little P over YM about me starting to document the recipes that I have tried before all the nice blog owners decided to stop blogging and deleting their posts! *gasp* but sadly it is true. I am a very noob cook who only started to try my hands in the kitchen after I moved to Australia - mainly because I miss food from home and eating out is stupidly expensive here.

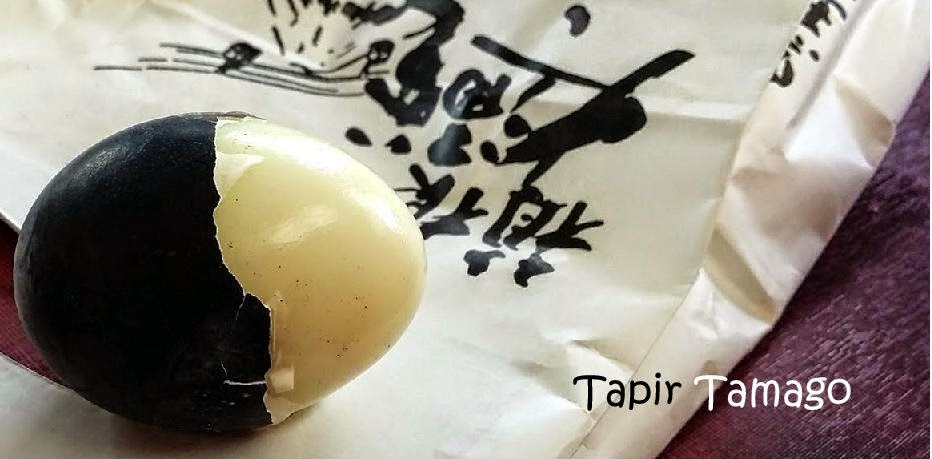
Tapir is a nickname given by Little P, said I somehow reminded her of a little tapir and tamago just a random chat we had over this blog. So, there you go - Tapir Tamago. Oh, she might not have realised but I borrowed the blog photo from her as well - a black egg from Hakone, coincidentally the egg shell removed partly, looking like a tapir! ^^