Thursday, March 26, 2015

Mum's home cooked crab

Yes - we served it on the frying pan itself! :P
Mum cooked this when she was visiting because I was missing some crab dish. In fact I have not eaten any crab since left Malaysia. Anyway, like all mums, she cooks with her scientific method of "agak-agak" (means guesstimate). Once I've re-try this I shall update this recipe but in the meantime, just so I don't forget. It taste great and home as mum has always cook crabs this way since I'm a kid.

Ingredients:

6 blue swimmers crabs (I stay in Melbourne and bought this from Queen Victoria Market)
6 shallots (or 1 big onion) - according to Mum, best to use shallots as it is more fragrant (in cooking term)
8-10 red chillies
1 1/2 heaped soup spoon of yellow bean paste (start with 1 heaped soup spoon and scoop another 1/2 spoon. Yes - the Chinese spoon used to drink soup)
Oil to fry

Method:
  1. Clean the crabs.
  2. Cut and blend the shallots, chillies and yellow bean paste into a course paste (alternatively use mortar and pestle).
  3. Heat some oil and fry the paste till fragrant.
  4. Put in the crabs, mix well and coat the crabs with the paste.
  5. Cover the pan with lid and let it simmer till the crabs are cooked.
  6. Serve with mantou (if you have made or have some at hand), else goes with white rice too!

Tuesday, March 24, 2015

Spiral Curry Puff (Karipap Pusing)

Aiya - didn't realise the photo is a bit blur...
Mum came for a two week visit recently and brought along with her a hand-written recipe by my aunt of what Mum described as 2 layer curry puff. I don't have slightest idea what Mum meant about 2 layer curry puff. To me, 2 layer would be way too thick for a curry puff skin. Not only I don't get the 2 layer bits, the handwritten recipe only has ingredients, but no method at all. = ="

After a long description, I finally found out that what Mum meant was spiral curry puff or karipap pusing in Bahasa Melayu. As Mum showed extreme interest, I thought I would give it a try and asked my best friend, Mr Google for methods of making this curry puff and to see if the ingredients are similar.

I used recipe from here, who adapted it from here but unfortunately it was not successful - the pastry splitted, probably because it was too dry? I wasn't quite sure what went wrong. I didn't really have plans to re-try this as I only make it initially as Mum seem excited over it. However due to my possible slight obsessive compulsive trait, I decided to give it another try but increase the butter amount in grease dough.

Anyway, here goes.

Ingredients:

Water dough:
300 g plain flour
½ tsp salt
125 ml (or 1/2 cup) lukewarm water
1 small beaten egg
1 tbsp of oil

Grease dough:
150 g plain flour --> I don't have enough flour when I make this again, so I halved the recipe)
75 g cold butter --> on my second batch, I used used 75 g flour with 50 g butter (so a full recipe would be 150 g with 100 g cold butter)

Curry puff filling:
1 large onion (finely chopped)
2 cloves of garlic (finely chopped)
2 tbsp of good curry powder --> I used 1 tbsp curry powder, 1 tbsp mixture of masala
3 large potatoes (cut into small cubes)
100 g of chicken breast (diced)
250 ml (or 1 cup) water
A sprig of curry leaves or less


Method:
Curry puff filling:
  1. Start by cooking the curry puff filling, whilst the filling cools, started on the dough.
  2. Saute the onion and garlic in a wok (or a pan) over medium heat. Add the potatoes and stir fry until it softens. Add in the chicken and curry powder.
  3. Ensure that everything is coated in the curry powder before adding in the water. Add the water slowly (little by little) and allow the curry to simmer.
  4. Once the potatoes have soften and the curry forms a dry curry mixture, set aside and let cool.
Water Dough:
  1. Combine all ingredients and knead with fingers until the dough becomes soft, pliable and non-sticky. 
  2. Divide and roll the water dough into two equal balls. 
  3. Cover and set aside to rest for at least 30 minutes. (The grease dough took me very long, so it was definitely more than 30 minutes)
Grease Dough:
  1. Cube the butter and cut into the flour with two knives and a fork until it resembles crumbly coarse sand. (I rub the butter with flour like making apple crumble)
  2. Knead by hand until it turns shiny and smooth (dough-like consistency). --> this took me ages...
  3. Divide and roll into two equal balls.
Forming the curry puffs:
  1. Roll out water dough a little then enclose one ball of greased dough with water dough. 
  2. On a lightly floured surface roll the combine dough into a thin oval shape with a rolling pin. Roll it up and with one end facing you, roll the dough out again into a thin layer.
  3. Turn the dough 90 degrees, so one side of the circles are facing you and repeat the above. 
  4. Sliced into 1 cm disc and roll it flat but not too thin or it would split into layers. 
  5. Place a tablespoon of the curry puff filling into the centre of the flatten disc and fold over.
  6. Seal the edges of the dough together by pinching and folding the flour to form a rope. 


I've also frozen some and fried them straight without thawing. Would I make these again? Unless I am super motivated as it is fairly time consuming, especially since I am such a slow cook!


Tuesday, March 17, 2015

Almond Biscotti

My first introduction to almond biscotti was via a HK drama. Hah! Bet you didn't see that coming - it was a little out of norm as biscotti is more of an Italian thingy. Anyway, when I first move to Australia, one of the first few HK drama I watched was this Forensic Heroes II. One of the male character made some almond biscotti for another female character to go with coffee while watching sunset. I tried to make this a few years back when I was still staying in Sydney and it was unsuccessful.


Before CNY, my sis made a batch of it and pronounced them successful! My interested was piqued and of course, promptly made some too. Sis recommended recipe from food4tots, please refer to food4tots for a better, detailed recipe. 


Ingredients:

120 g plain flour (all-purpose flour)
30 g almond flour (ground almond)
½ tsp baking powder
1 egg (about 65g) – at room temperature
75 g castor sugar --> I used about 35 g
Pinch of salt
95 g almonds (raw)

Method:
  1. Rinse almonds lightly, pat dry with kitchen towel. (it’s optional) --> I skipped this step
  2. Place almonds on a baking tray and bake in a preheated oven at 160 C for 8 minutes. Give it a stir or shake after 4 minutes. (I may have forgot to.) Set aside to cool.
  3. In a medium mixing bowl, sieve plain flour, almond flour and baking powder. Then use a hand whisk to combine.
  4. In another bowl (a bigger one), beat the egg lightly with a hand whisk or electrical mixer. Add sugar and salt. Beat until the mixture is fluffy and pale. 
  5. Add in flour mixture (from step 3). Use a rubber spatula or plastic scraper to mix all the ingredients until well combined. You can use technique such as cut, press and scrape to mix. (I have no idea what this technique is…)
  6. Add in the roasted almonds. Mix until well combined and form a dough. At this stage, the dough is quite sticky. So, dust your hands and counter top with more flours before proceeding to the next step.
  7. Transfer the dough to a floured surface. Divide the dough into two equal portions, roll into log shapes (22 cm length x 5 cm width x 1.5 cm thickness) and then flatten slightly. 
  8. Place the logs on a baking tray lined with grease-proof baking paper. Transfer the tray to oven, bake at 160 C for 30 minutes or until well risen and firm. If your logs show uneven colour, rotate them at 180 degree towards the last 5 minutes.
  9. Remove from the oven and let it cool for about 15-20 minutes. 
  10. When the logs are cooled, use serrated knife to cut it diagonally into thin slices (0.3 cm thickness or thicker if crumble). 
  11. Arrange slices on the lined baking tray, transfer to oven, place at the lowest rack and bake for a further 150 C for 14 minutes (7 minutes for each side) or until slightly golden brown.
  12. Cool on rack and keep in an air-tight container for several weeks.


Sunday, March 15, 2015

Mini Lemon Tarts

I like desserts made with lemons - the tangy lemon taste kind of offset just the normal sweet dessert. Anyway, I benefit with some home grown lemons from Little P's boyfriend and as there was a planned small get together at my place, what's better than use the lemons and made some desserts? I went on my usual googling spree and found this easy to make mini lemon tarts. Mini size is great, one bit into the mouth :D

I got the recipe from Butter Baking. It appears it was initially adapted the pastry from David Lebovitz and filling from Tartine.

I have actually made this recipe twice in a month - once for the CNY get-together and second time when my mum was here visiting. Both times I halved the recipe and it made 24 mini tarts.

I cheated, this photo is taken on a separate day after I have made the tarts. The measuring jug contains some leftover lemon filing.
Ingredients:
Tart pastry:
180 g unsalted butter (6 oz) --> I used 90 g reduced salt butter
6 tbsp water --> 3 tbsp
2 tbsp vegetable oil --> 1 tbsp
2 tbsp sugar --> 1 tbsp castor sugar
Pinch of salt --> I omitted this as I used reduced salt butter
2 cups flour (300g, 10 oz) --> 1 cup

Lemon filling:
¼ cup plain flour (35g, 1¼ oz) --> 1/8 cup
1 cup sugar (220g, ½ pound) --> I used 3/8 cup (¼ cup + half of ¼ cup)
½ cup lemon juice (125ml, 4 oz, about 3 lemons) --> ¼ cup
zest from 1 lemon, grated --> zest from ½ lemon
3 eggs --> 1 big egg + 1 small egg
1 egg yolk --> 1 small egg
pinch of salt

Method:
To make tart pastry
  1. Preheat the oven to 200 C (400 F) and take out two mini muffin pans.
  2. Place the butter, water, oil, sugar and salt in an ovenproof bowl.
  3. Put the bowl in the oven for about 15 minutes until the butter is melted, bubbling, and just beginning to brown around the edges.
  4. Carefully remove the bowl from the oven and dump in the flour. Stir quickly, until the dough comes together and pulls away from the side of the dish.
  5. Put a teaspoon of dough into one mini muffin hole, and press it into the base and up the sides using fingers and try not to make a hole. Repeat until all the dough has been used.
  6. Prick the dough with a fork once or twice.
  7. Bake for 8 - 12 minutes until the pastry is golden brown all over.
  8. Remove from the oven and allow to cool slightly.
To make tart filing
  1. Reduce the oven to 150 C (300 F).
  2. Combine the flour and sugar in a medium mixing bowl.
  3. Add the lemon juice and zest to the same medium mixing bowl and mix to dissolve the sugar.
  4. In a separate bowl, whisk the eggs and the egg yolk with salt.
  5. Add the eggs into the lemon and sugar mixture and whisk until well combined.
  6. Put the mini muffin tins back in the oven, pull the oven rack out of the oven slightly and pour the filling into each pastry case while it is still in the oven. (I took the whole muffin tins out to pour the filling, don’t trust myself to work on the case while it is still in the oven)
  7. Shut the oven door and bake for 5 – 10 minutes until the centers are just set.


Err.. yes, I have limited resources of accessories to plate up and half the time I test-eat them very soon or store up in some container. Hopefully we shall see some improvement on this part down the road but don't let this stop you from trying this recipe. My mum loves it... and she is a strict judge!

Tapir Tamago

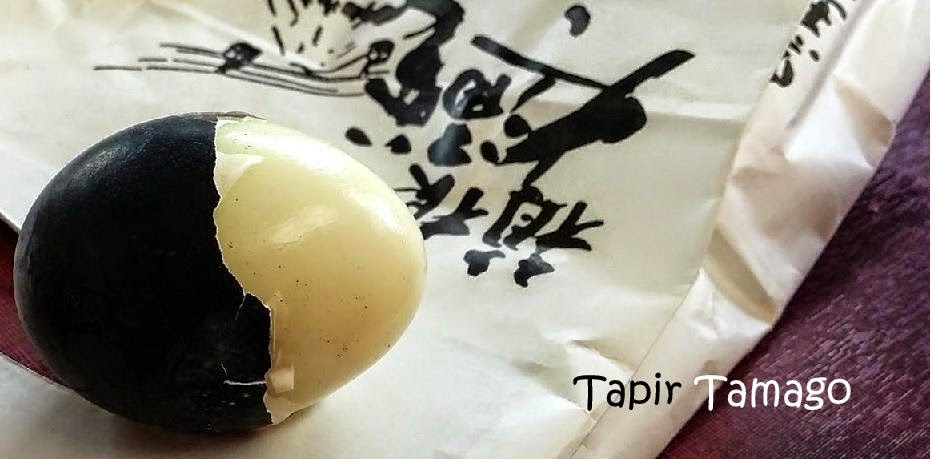
I was chatting with Little P over YM about me starting to document the recipes that I have tried before all the nice blog owners decided to stop blogging and deleting their posts! *gasp* but sadly it is true. I am a very noob cook who only started to try my hands in the kitchen after I moved to Australia - mainly because I miss food from home and eating out is stupidly expensive here.

Tapir is a nickname given by Little P, said I somehow reminded her of a little tapir and tamago just a random chat we had over this blog. So, there you go - Tapir Tamago. Oh, she might not have realised but I borrowed the blog photo from her as well - a black egg from Hakone, coincidentally the egg shell removed partly, looking like a tapir! ^^